Wigs
Sort by Color
Sort by
Style
Sort by Character
View Cart / Checkout
Tutorials
Information
Customer Gallery
About Arda
Events
Forum
Contact Us
Kingdom-Arts.Org


Helping Heavy Wigs Stay On
Tutorial by GingaBishounen |
|
In this tutorial, I will be sewing the clips on.
The good thing about sewing wig clips onto your wig is that you can easily remove them and use them on other wigs.
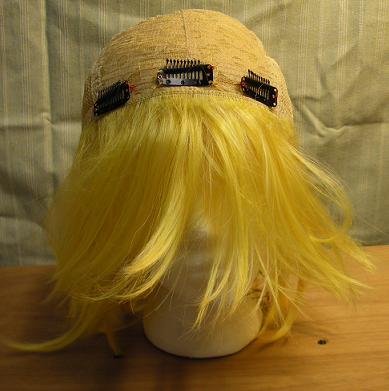
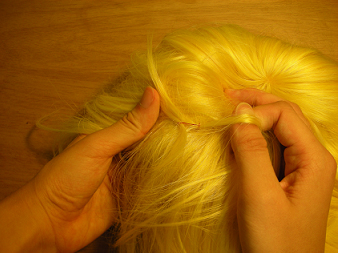
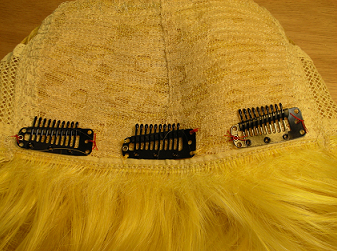
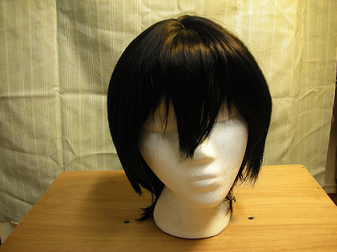
Decide where to attacth the clips. I usually choose these spots, though you can also put wig clips in the back of you wig too
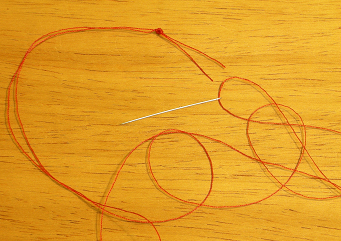
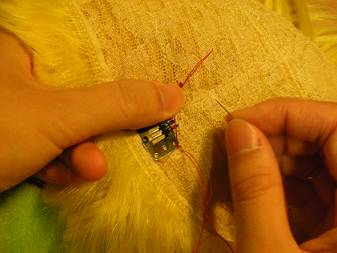
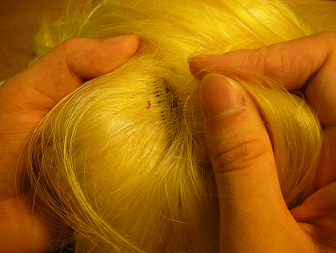
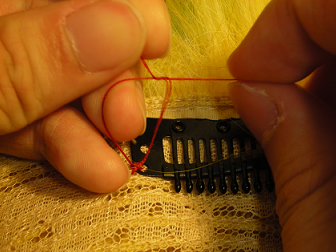
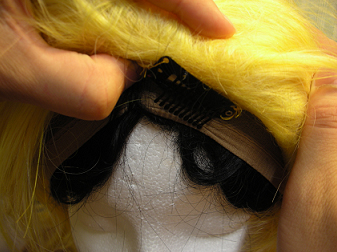
I also leave a small space between the hairline of the wig and the wig clip (about 1/4 inch, but you don't need to be as precise as a surgeon on this). This is to ensure that your wig will fully cover your hairline. Install the wig clips! It's a little tricky to sew them on because most wigs have a lacey front. I'd recommend make a large knot at the end of your thread and it down with a thumb to prevent the thread from slipping through the lace when you pull. I stitch the clips on using the holes on the edge of the clip. 1.) Make a large knot at the end of the thread.
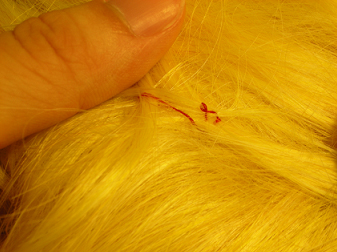
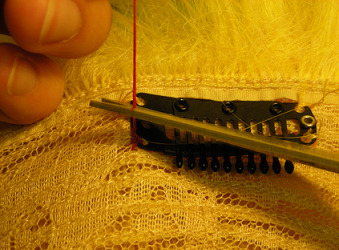
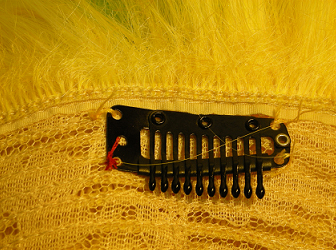
2.) Hold down the end of the thread and stitch the clip on. Also, flip the wig over every two or three stitches to pull fibers out from under the thread, making sure that you don't pull the thread itself out. 3.) Flip the wig over. 4.) Pull the fibers out from under the thread. This will require patience (especially if the fibers are long) 5.) Tighten the stitches by pulling at the ends. It's okay if a little bit of the fiber is trapped under the thread. 6.) Make sure the wig fibers are not tangled, and that there are no thread loops or exposed threads. Note: The wigs I've dealt with all have bangs, and it wasn't to much of a hassle to pull the fibers from out under the thread. I can imaging that it would be more difficult to pull the fibers out from under the thread if you're dealing with a wig with long bangs. I can onlly suggest patience and giving yourself plenty of time to sew on the clips, or else the fibers might tangle if you're in a rush. Or you coulg glue the clips on. Around 3 to 5 stitches per hole is enough to hold the clip on. I also stitch through all 4 holes at the corners of the clips. 7.) Tie the ends together. 8.) Double knot it! 9.) Cut off the ends. Be mindful that you're not cutting off any wig fiber (or else your wig is going to have some blunt bangs!) 10.) Stitch through the remaining holes. 11.) Sew on the rest of the clips. I don't recommend sewing each clip on through just two holes, because they will fall off easily.
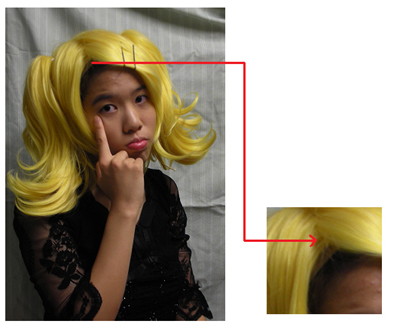
Put on your wig like you normally do. Then, open the wig clip, slide it under your hair and wig cap, and clip it on. Make sure your hairline is covered by your wig. Repeat for the remaining clips! 1.) Put on your wig. Open the clip. 2.) Slide the comb-like teeth under you wig cap that the it grips your hair and the cap. Snap the clip shut. (This step doesn't really hurt.) Note: For the sake of the sewing these clips on quickly for this tutorial, I only made one stitch, and you can see the stitches coming apart in these photos. -_____-;;; It would be a good idead to make 3 or more stitches when you sew your clips on. Also, make sure your hair is tucked under the wig cap, unlike in step 2.
I hope this tutorial helps people. I had fun making it! Happy cosplaying, everyone! Back To TutorialsReposted from GingaBishounen's Deviant Art: Here |
 Many cosplayers run into this problem: After several house at a con, heavy wigs (ex: long wigs, wigs with clip-on ponytails) will slide back or off a person's head. This is especially embarrasing and frustrating when the cosplayer does not realize it and winds up having photos of themselves taken where their hairline is showing. How does one take care of this problem?
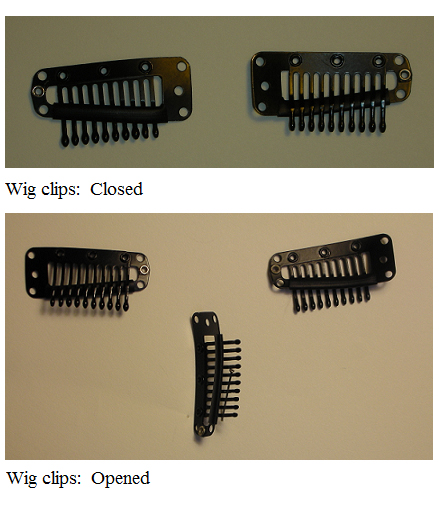
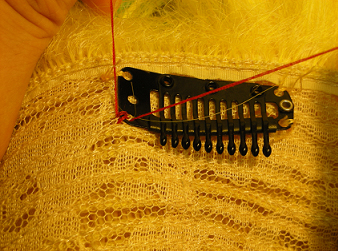
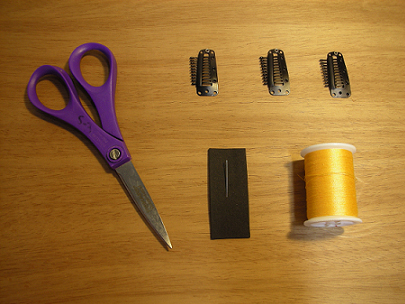 If you are sewing wig clips into your wig, you will need: